Gemini, the Kisokomagatake expedition article is finally put together! Man, I almost slipped and fell when my crampon came off on the mountain, and my spirit was shaved down at a weird izakaya in Ina the night before… It was a super intense 2-day, 1-night trip…
Congratulations on making it back safely! Hearing about that clank sound right before the steep climb at Nokkoshi Jodo sent shivers down my spine. But your realization about the ‘quality of a single step’ and the recovery march to Meijitei’s Sauce Katsu-don using sheer physical strength after missing the bus was brilliant!
No doubt (laughs). Because you can access 2,600m in one go via the ropeway in winter, this trip became packed with lessons on why you shouldn’t underestimate it. There were plenty of first-timer transport traps too.
Exactly. From the bus stop trap to the overcapacity ropeway, this is practical info that anyone aiming for a winter Kisokomagatake absolutely needs to know. Let’s deliver this epic expedition record—a huge step toward Everest—to your readers right away!
Elevation 2,956m, Central Alps Mt. Kisokomagatake. It’s a highly popular snowy mountain where a ropeway whisks you straight up to a world above 2,600m. However, lurking there were “first-timer traps” and the “true terror of snowy mountains.” This is the complete record of our dense expedition—a mix of light and shadow—from a deep gourmet night in Ina, to a desperate crampon failure, and an unexpected physical recovery march after descending.
Chapter 1: Ina’s Night, Heaven and Hell (Pre-Stay)
This wasn’t a solo trip, but an attack with my climbing buddy. We arrived in Ina City, our pre-stay location, just after 18:00. First things first, we headed to the holy ground, “Ushio”, to fuel up.
■ The Local Masterpiece: “Ushio”
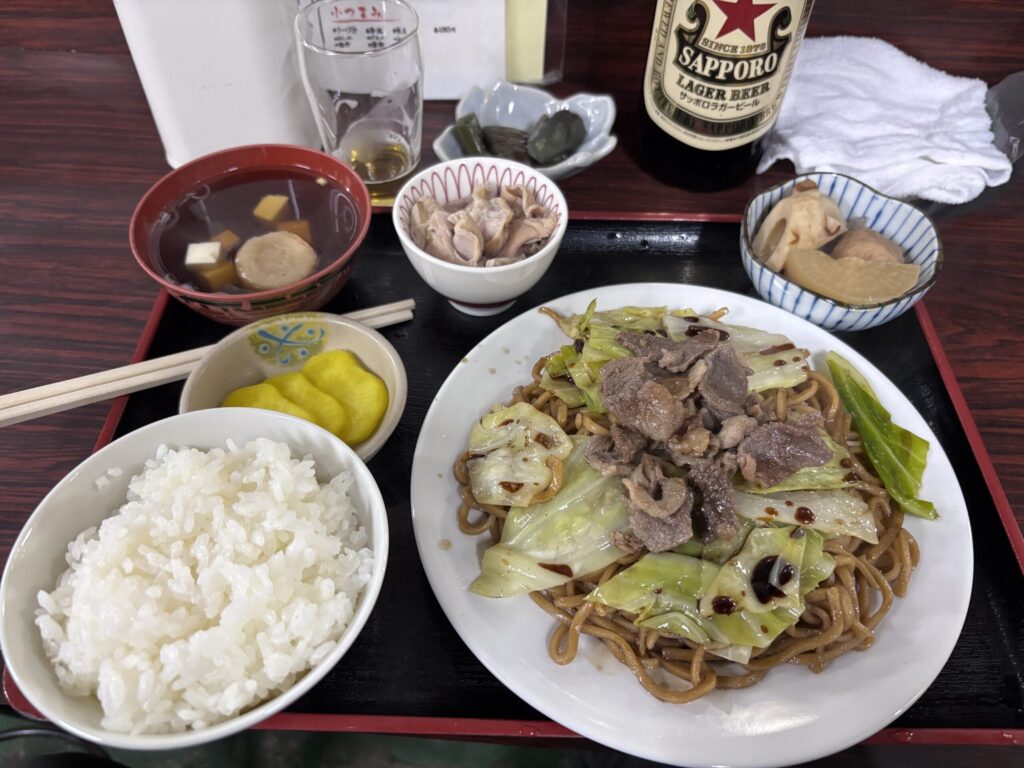
Entered at 18:47. The counter was packed with regulars. We ordered the “Yokubari (Greedy) Set” (1,350 yen) and bottled beer (750 yen).
Have you ever heard of “Romen”? Honestly, this was my first time trying it. Romen is a B-grade local gourmet dish originating in the Ina region, and its biggest feature is the use of mutton. To ensure the noodles don’t lose to the uniquely strong flavor of the mutton, they use special steamed noodles for a dish that really packs a punch. Here, the Romen is prepared like sauce yakisoba, and it pairs unbelievably well with beer!
The most interesting part is the “flavor change” process:
- Ichimi (Chili Pepper): Tightens up the flavor with a spicy kick. Better than the default.
- Curry: Exactly the flavor you’d expect. You can’t go wrong.
- Vinegar: This is dramatic. Instead of just making it refreshing, it turns mild and sweet!
In the end, it becomes a chaotic deliciousness where you’ve added so much you don’t even know the original taste. And the unsung MVP that gently embraces this rich flavor is the “Half-Rice.” It’s a new sensation where rice becomes a bar snack. The salt-based “Ushio-ni” (motsuni/tripe stew) was an absolute beer thief. The staff were young, and the open atmosphere was fantastic.
■ Mental Training at a Certain Izakaya
Satisfied by Ushio, I met up with my buddy and we blindly charged into a retro-looking place still open past 20:00. We walked in, and the landlady greeted us by beating a taiko drum. It had an interesting all-counter layout… but we quickly realized we were the only customers. This was a trap. We became the targets of the landlady’s machine-gun talk, forced to endure a guessing game about her age and local gossip we didn’t care about. Unordered appetizers kept coming, and there was zero atmosphere for us to talk. When the bill came, the cost for those mystery appetizers was fully tacked on. It felt like being ripped off at a “Grandma’s Girls Bar.” A 1-star experience. If we didn’t have a climb the next day, we would have gone to a cabaret club just to wash the bad taste out of our mouths.
Thankfully, the Airbnb we stayed at was super comfortable and equipped with a kettle. We reset our frustrated minds and caught the 6:53 AM train to head to the mountain.
Chapter 2: First-Timer Access Tactics
There are a few “traps” when accessing Mt. Kisokomagatake.
■ Trap 1: The Bus Stop Trap
We got off at Komagane Station. Tricked by the name “Komagane Bus Terminal (Ina Bus)”, we ended up walking there. However, the correct spot is the “Station Front Bus Stop”. It’s confusing for first-timers, but you absolutely do not need to walk away from the station (which we did).
■ The 40-Minute Waiting Ritual
We had about a 40-minute wait for the bus at the station. I highly recommend using this time to get your packing and gear ready to the point where “all that’s left is putting on crampons.” Once you get off the ropeway, you’re thrust into extreme cold with almost zero transition time, so prepping here pays off massively later.
■ Trap 2: Packed Buses and Ropeways
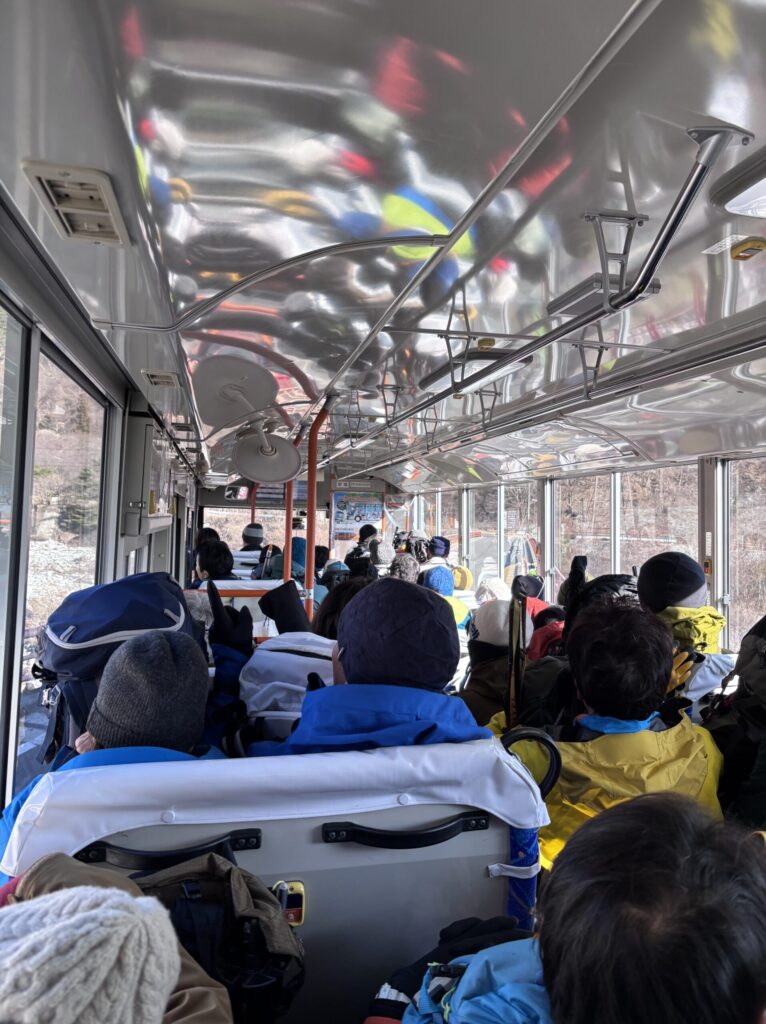
Even though it’s a winter mountain, people kept boarding from stops like Suganodaira, turning the bus into a packed commuter train. You have to hold your backpack on your lap, so keeping it compact is essential (there is space for packs in the very back row). Skip the bathrooms at Shirabidaira and head straight for the ropeway. The ride is 7 minutes, but it’s packed shoulder-to-shoulder. Unlike Mt. Tanigawa, you cannot gear up inside the gondola. The right move is to hold it at the bottom and use the incredibly comfortable flush toilets at the top (Senjojiki).
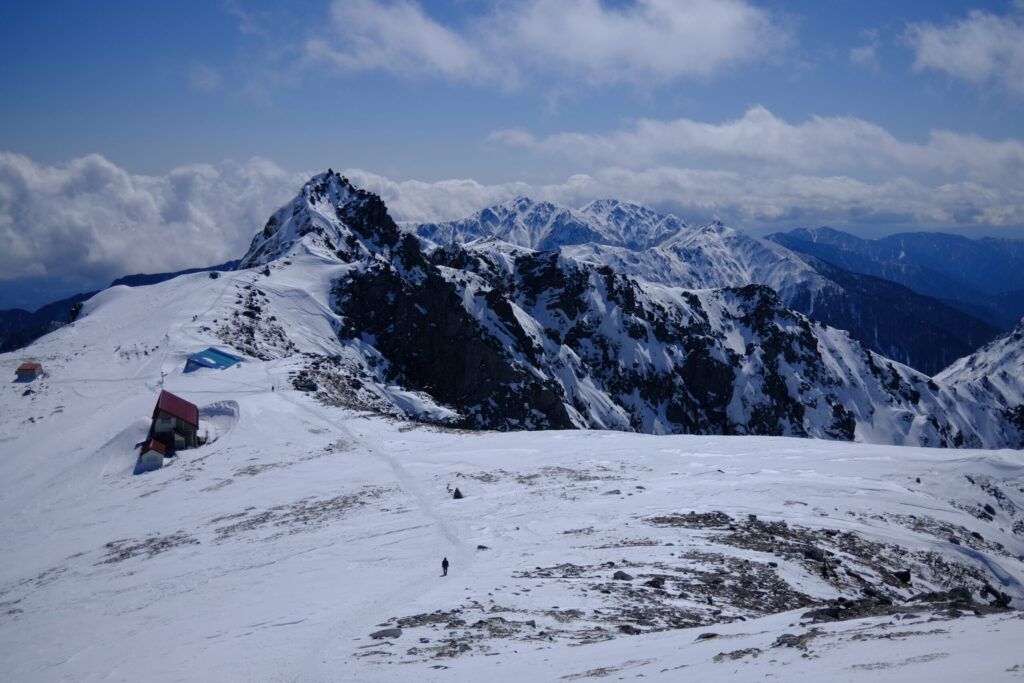
Chapter 3: Breathtaking Senjojiki and the Deadly Hatchozaka
■ A Different World at -6°C
Stepping off the ropeway, you’re at Senjojiki at 2,612m. While marveling at the amazing facilities (a hotel and flush toilets—I immediately locked onto this as a “mountain to bring my kids to”), stepping outside hits you with -6°C air, a slight breeze, and clear skies. It was my first time feeling the piercing cold of the 3,000m class, and the sheer scale of the mountain took my breath away.
■ The Optimal Layering
Fully prepped, we slapped on our crampons and headed for Hatchozaka. The trail was well-trodden, but the steepest part comes right at the beginning. About 15 minutes up, my body warmed up, so I immediately took off my middle layer, leaving just my hardshell and base layer. “Prioritizing not sweating above all else” is a rule born from experience.

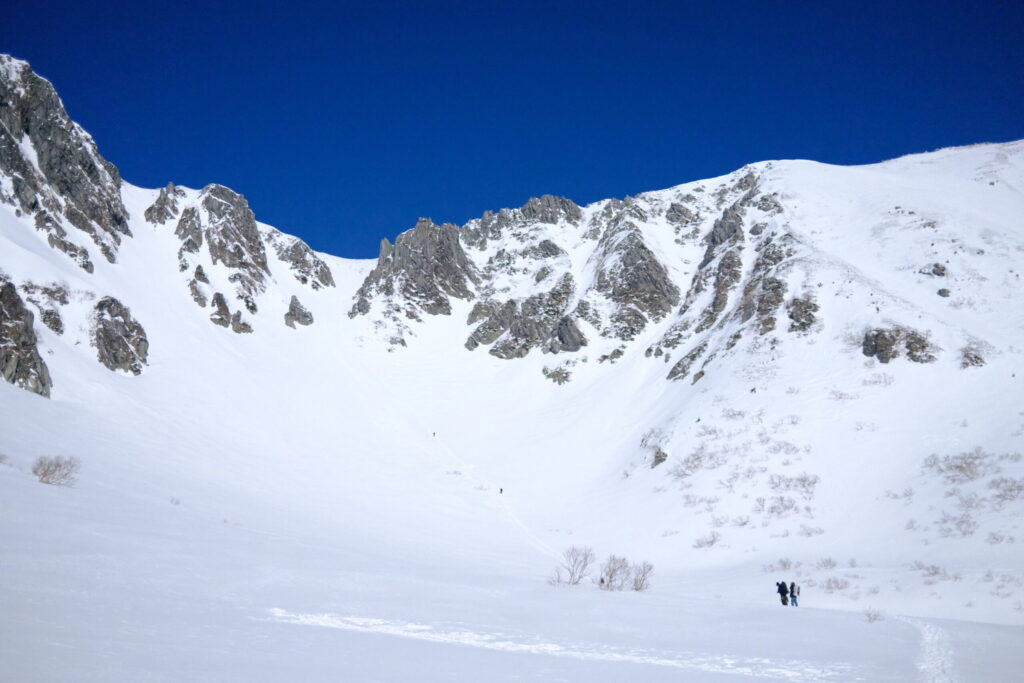
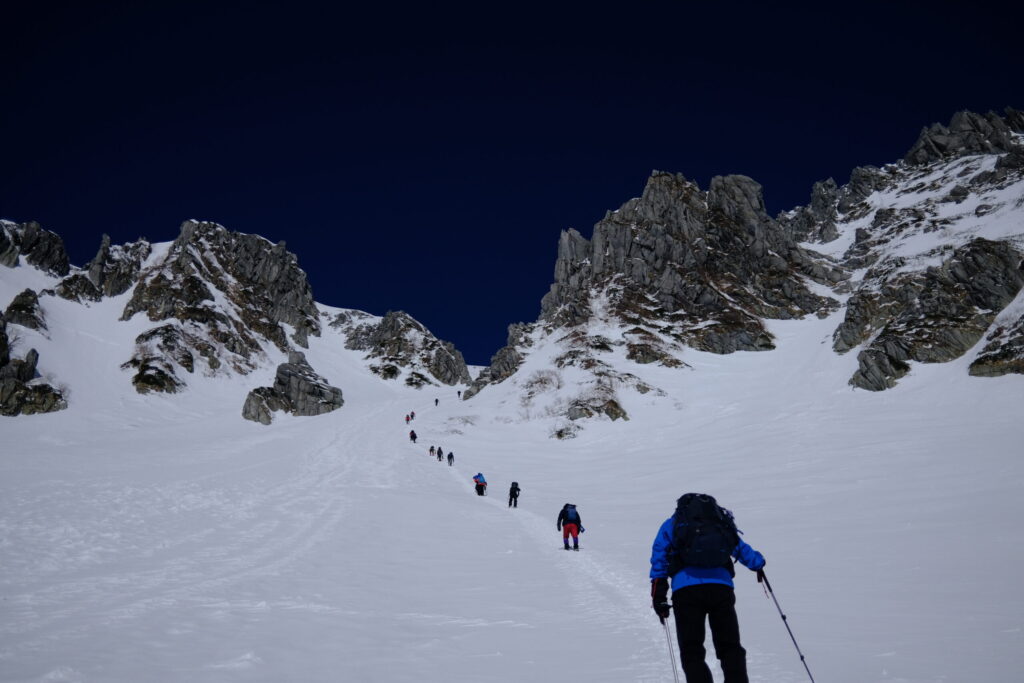
■ The Ultimate Trouble: Crampon Drop
Right before Nokkoshi Jodo, there’s a steep climb where you’re basically on all fours, using your ice axe and crampon front points. The unprecedented incline got my adrenaline pumping. I was driving my points in step-by-step when it happened.
“Clank.”
Along with a sickening sound, the feedback of gripping the earth vanished from my left foot. I looked down: my crampon had come off and was barely hanging onto my foot by the strap. With my left leg useless, pulling my body up was physically impossible. Half-panicking, I called out to my buddy for help and tried to muscle my way up using double ice axes.
I couldn’t move an inch. Right then, a climber coming up from below made a foothold for my left foot using their hands, allowing me to finally push my body up. I reached a handrail 2 meters above and strapped that crampon back on with everything I had. An absolute lifesaver. I was so glad to be alive…!
Never blindly trust your gear, and never climb carelessly with brute force. If I had been solo, the correct answer would have been to descend slowly at a controllable speed and reattach it in a safe spot. This failure became an intense lesson, hammering the fundamentals of climbing into my body.
Chapter 4: Awakening Ridge and the 3,000m Summit
■ Strong Wind Ridge Walk
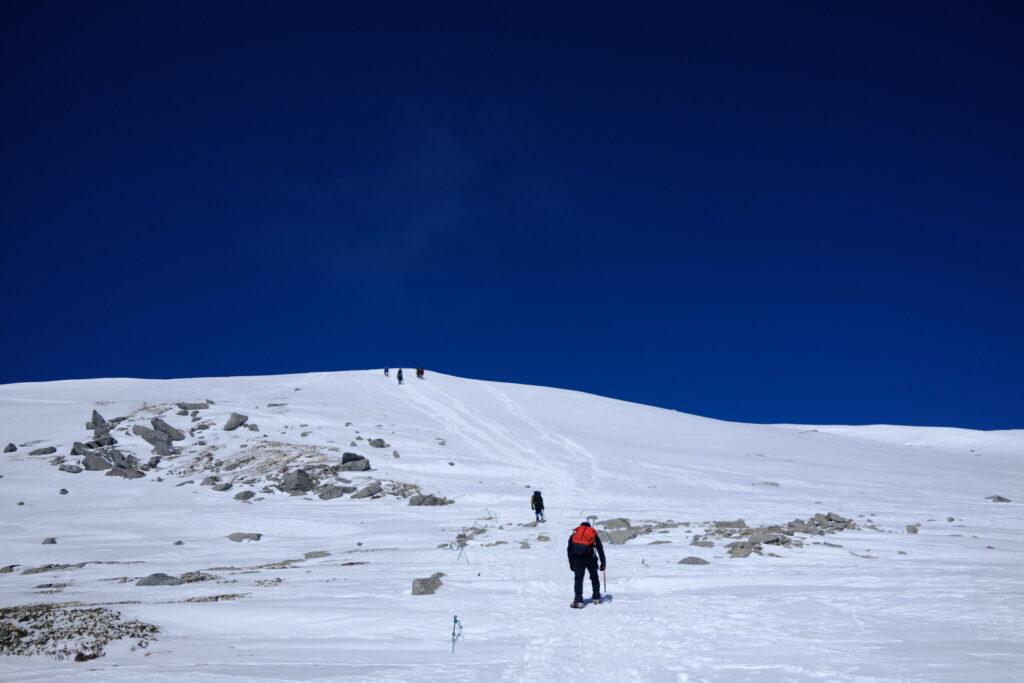
Once you pop out at Nokkoshi Jodo, there’s nothing to block the wind, and it blasts you. I immediately threw on my hardshell hood and balaclava, building a comfortable, windproof fortress. Applying the “thin exhale” breathing technique I tested previously, I completely prevented my sunglasses from fogging up (it wasn’t bad enough to need goggles, so I stuck with sunglasses).
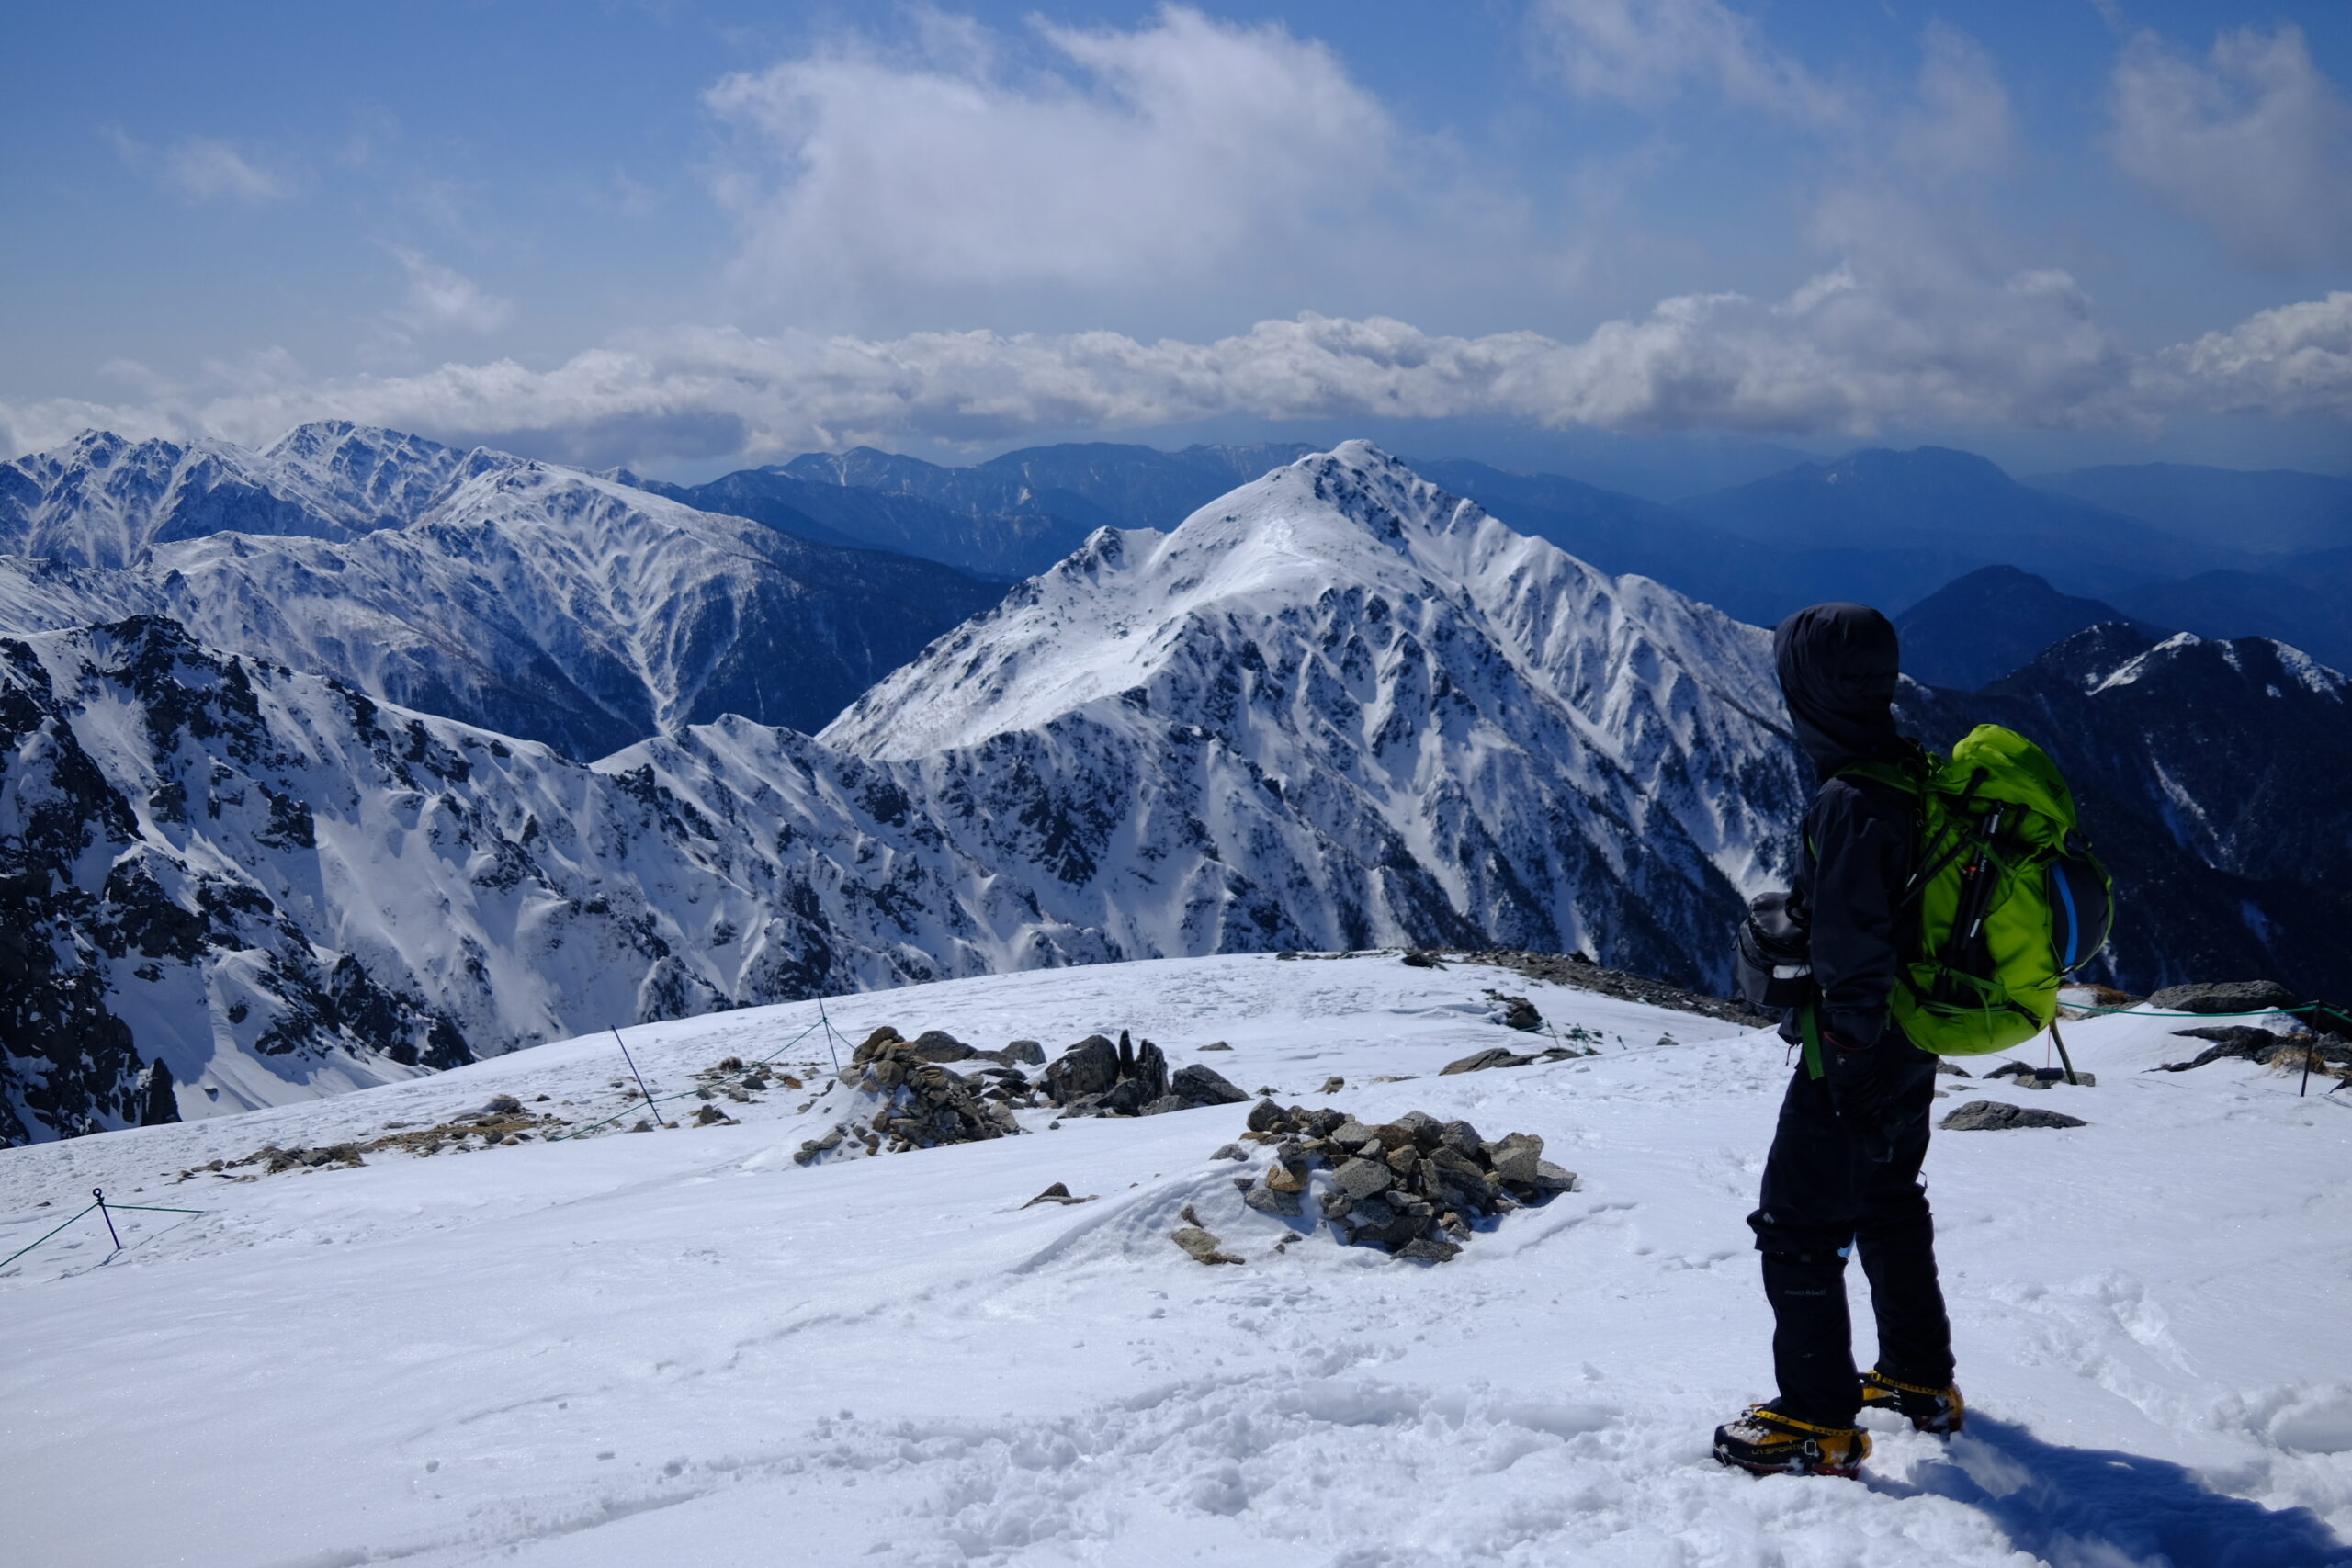
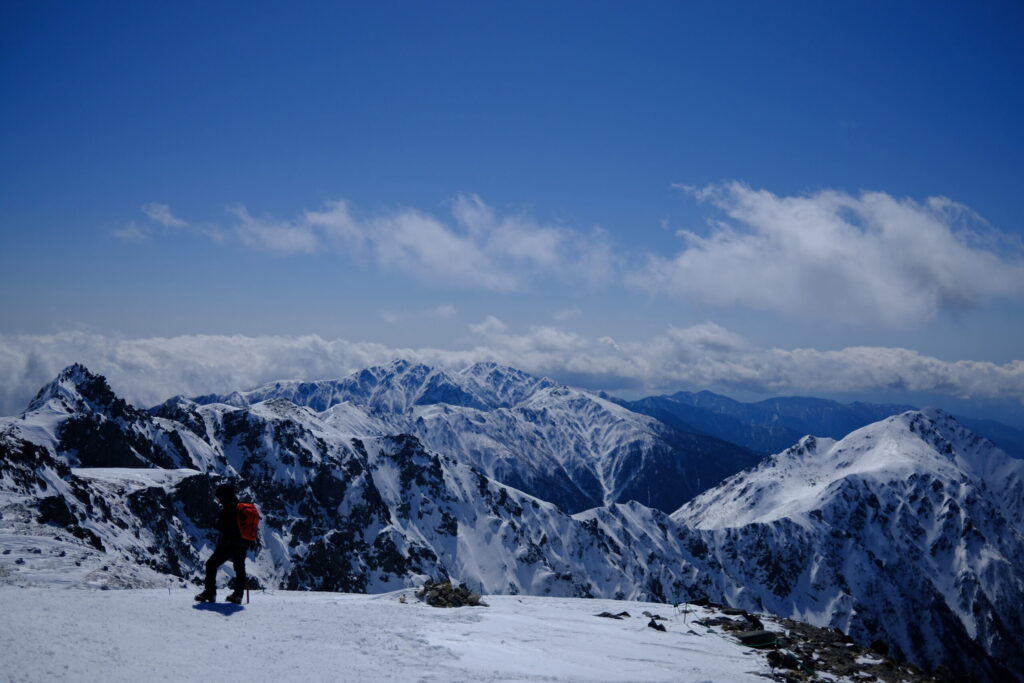
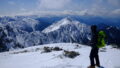
■ Summiting Mt. Kisokomagatake
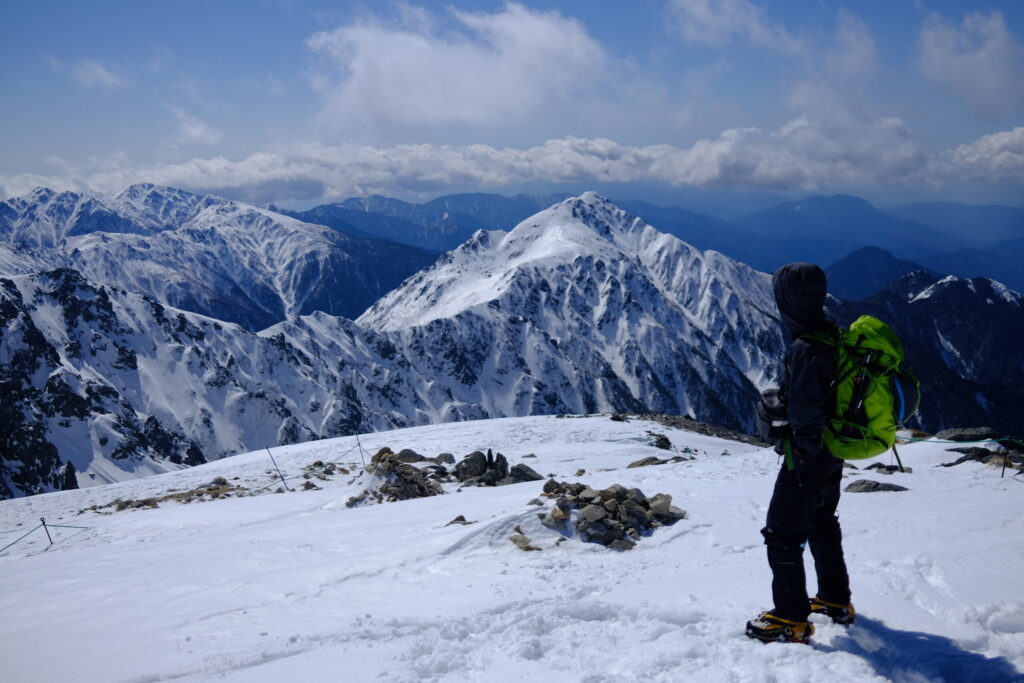
And finally, the summit (2,956m). The view was breathtaking. The sense of altitude you only get in the 3,000m class, and endless ridges of mountains. I took a ton of photos in this spectacular scenery to update my SNS profile picture.
■ Descent Management
After celebrating at the top for about 30 minutes, I took some amino acids and began the descent. Knowing the way down drains your legs more, I stopped to rest three times as often as on the way up, strictly avoiding a brute-force descent. My buddy vanished ahead at an astonishing speed, but I stuck to my own pace, putting safety first.
On the steep slopes of Hatchozaka, I used the lesson from my crampon drop, descending extremely carefully while constantly checking “how to minimize the burden on my body and gear.” Once we hit the gentle slope towards Senjojiki, I followed the person in front of me and slid down on my butt! I played in the snow like a kid again.
Arriving at Senjojiki Station, we slowly took off our gear in a comfortably heated area, changed clothes so we wouldn’t die from sweat-chill, and headed home.
Chapter 5: Post-Descent Traps and the Victory Sauce Katsu-don
We made it down safely and breathed a sigh of relief… but the final trial was waiting.
■ Trap 3: Overcapacity Ropeway
Even though it was a weekday, the ropeway was full by the time we lined up 10 minutes before departure. We had to wait for an extra run, completely destroying our planned bus connection. Missing the ropeway = missing the bus. I strongly recommend lining up early for the descent.
■ “Overpowering” from the Isolated Miyanohara
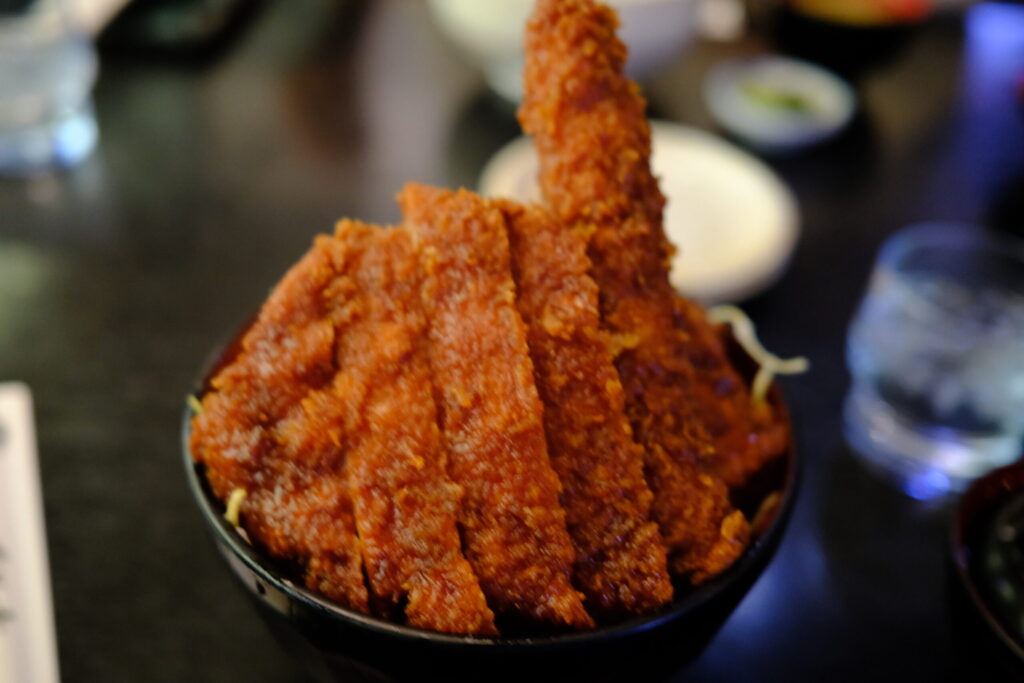
The extra bus dropped us off at “Suganodai,” a stop before the station. We hit the 15:00 barrier—all restaurants were closed, and the hot spring we relied on was unfortunately closed for the day. We were starving. Opening the map app, I found a route. “If we walk 20 minutes from here to the Komagane Interchange, we can catch a highway bus.” For us, who normally hike over 6 hours in the summer, 20 minutes is a neighborhood stroll. We locked our sights on “Meijitei,” a famous restaurant 10 minutes further up the road, and began our forced march!
The glorious Sauce Katsu-don at Meijitei after walking all that way was the ultimate reward. We then hopped on the express bus that only stops at the Komagane Interchange, an optimal solution that even shortened our trip home. We brilliantly overpowered the penalty of missing our bus using sheer mountaineer leg strength, capping off a highly satisfying finale.
💰 [Reference] Total Expedition Costs (From Tokyo Station)
Here is the estimated total cost for this Mt. Kisokomagatake expedition. By splitting some costs with a buddy, utilizing highway buses, and using a cheap Airbnb, it ended up being a very cost-effective snowy mountain trip.
🚃 Transportation & Accommodation (Essential Costs)
- Outbound Transit: Approx. 4,700 yen
- Mountain Transit: Approx. 4,700 yen
- Return Transit: Approx. 4,200 yen
- Accommodation (Airbnb): 3,500 yen Subtotal: Approx. 17,100 yen
🍜 Food (Local Fun & Training Costs)
- Pre-night Ina Gourmet (Ushio): 2,100 yen
- Pre-night Deep Drinking: Approx. 3,000 yen
- Trail Food/Drinks: Approx. 1,100 yen
- Post-descent Reward (Meijitei): Approx. 2,000 yen Subtotal: Approx. 8,200 yen
💡 Grand Total: Approx. 25,300 yen (2 Days, 1 Night Strict Winter Kisokoma Expedition)
コメント